Order Process
Create Your Honey Labels Following These 7 Easy Steps
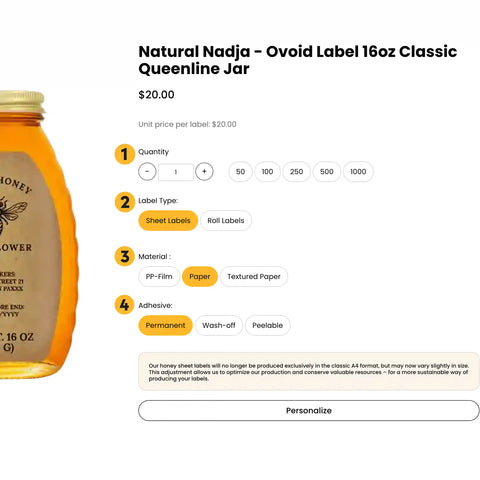
Step 1: After picking a template and the right format, you will first have to provide parameters such as quantity of labels. It doesn't matter if it's 10 or 1000 honey labels, thanks to our digital printing presses even short print runs are efficient and can be produced cost-effectively. On the right, the price for your honey labels will be displayed in real time.
Step 2: Then, you will choose how you want to receive your honey labels. This means that you pick between getting your labels on rolls or sheets. Roll labels are ideal if you process your honey labels mechanically, whereas sheet labels are great for manual application.
Step 3: Now it's time to choose your label material. We suggest you keep the circumstances in mind that your label will have to perform under. On top of that, you should choose the material that is most in line with the aesthetic that you want for your honey. This way, you will make sure that you will get the ideal honey label for your product in the end.
Step 4: Next, you pick the right adhesive. You can choose between peelable, wash-off and permanent adhesive. Many honey jars are reused multiple times. In that case, we recommend our peelable or wash-off option.
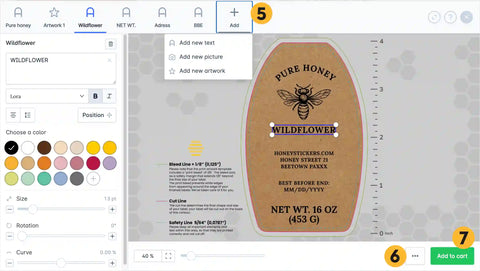
Step 5: Once you have specified the quantity, material, and adhesive, you will start to personalize your honey label. Add or remove graphic elements, pictures, and texts according to your liking. Feel free to adjust each element. Graphic elements can be made bigger, smaller or they can be rotated, for example. In our graphics library, you will find a large number of graphics you are free to use. Moreover, we include placeholders for you to fill in mandatory information in our templates. To check the font size we have included a ruler for you to check during your design process.
Step 6: When you are logged into your account, you can easily save the designs you create, by simply clicking on the three dots next to the "Add to cart" button. This allows you to continue working on your honey label, and adding it to the cart at a later date.
Step 7: When you are done add the custom honey label to the cart and finish your order. In your account you will find an overview of your order.
Tips for Uploading Images & Graphics
Our online design tool gives you a lot of creative freedom. As well as using the pictures and graphics in our design library, you can also upload your own files. This way, you can add any images and graphics of your choice to your honey labels. However, there are some things you need to keep in mind to ensure the final result matches your expectations.
- When uploading images and graphics, make sure they were created in the CMYK color space, not RGB. Essentially, RGB is used for digital contexts, such as on computer screens and smartphones, whereas CMYK is used for printed products, such as your labels. Handing in files in RGB will result in distorted printing images.
- If you want to add your logo to your labels, it is best to upload an image with a transparent background. Otherwise, the label’s background color may vary slightly from your logo’s background.
- Finally, your images should be uploaded as PDF, JPG, JPEG, PNG, and TIF. Your files cannot be over 30 MB and should have a resolution of at least 200 dpi.

❗ Note on the Color White in the Background
In our online designer, the color “white” does not correspond to an opaque white print. Instead, it is treated as transparent or colorless. The background color is determined by the paper itself, for example, natural paper may appear slightly yellowish. Leaving areas white in your design is ideal for highlighting the key elements of your label, as it lets the natural color of the paper show through rather than covering it with ink.
❗ Note on color selection: Our online designer works in RGB color space, which is optimized for digital media. However, for printing, the colors are converted to CMYK color space. Therefore, the colors you select may differ slightly when printed from what you see on screen. To achieve the most accurate result possible, we recommend using our predefined colors.

Bleed Line, Cut Line and Safety Line
Bleed Line (green line) + 0,125”:
Please note that your label artwork should include a “print bleed” of 1/8” around
your design. The bleed acts as a safety margin that extends 1/8” beyond the final size of your label. The print bleed prevents white edges from appearing around the edge of your finished labels.
Cut Line (pink line): The cut line determines the final shape and size of your label; your label will be cut out on the basis of this contour.
Safety Line (blue line) 0,0787”:
Please keep all important elements and text within this area, so that they are printed correctly and not cut off.


